- Published on
Working with Raspberry Pi and Ultrasonic Sensor
- Authors
- Name
- UjjwalBgn


Connections
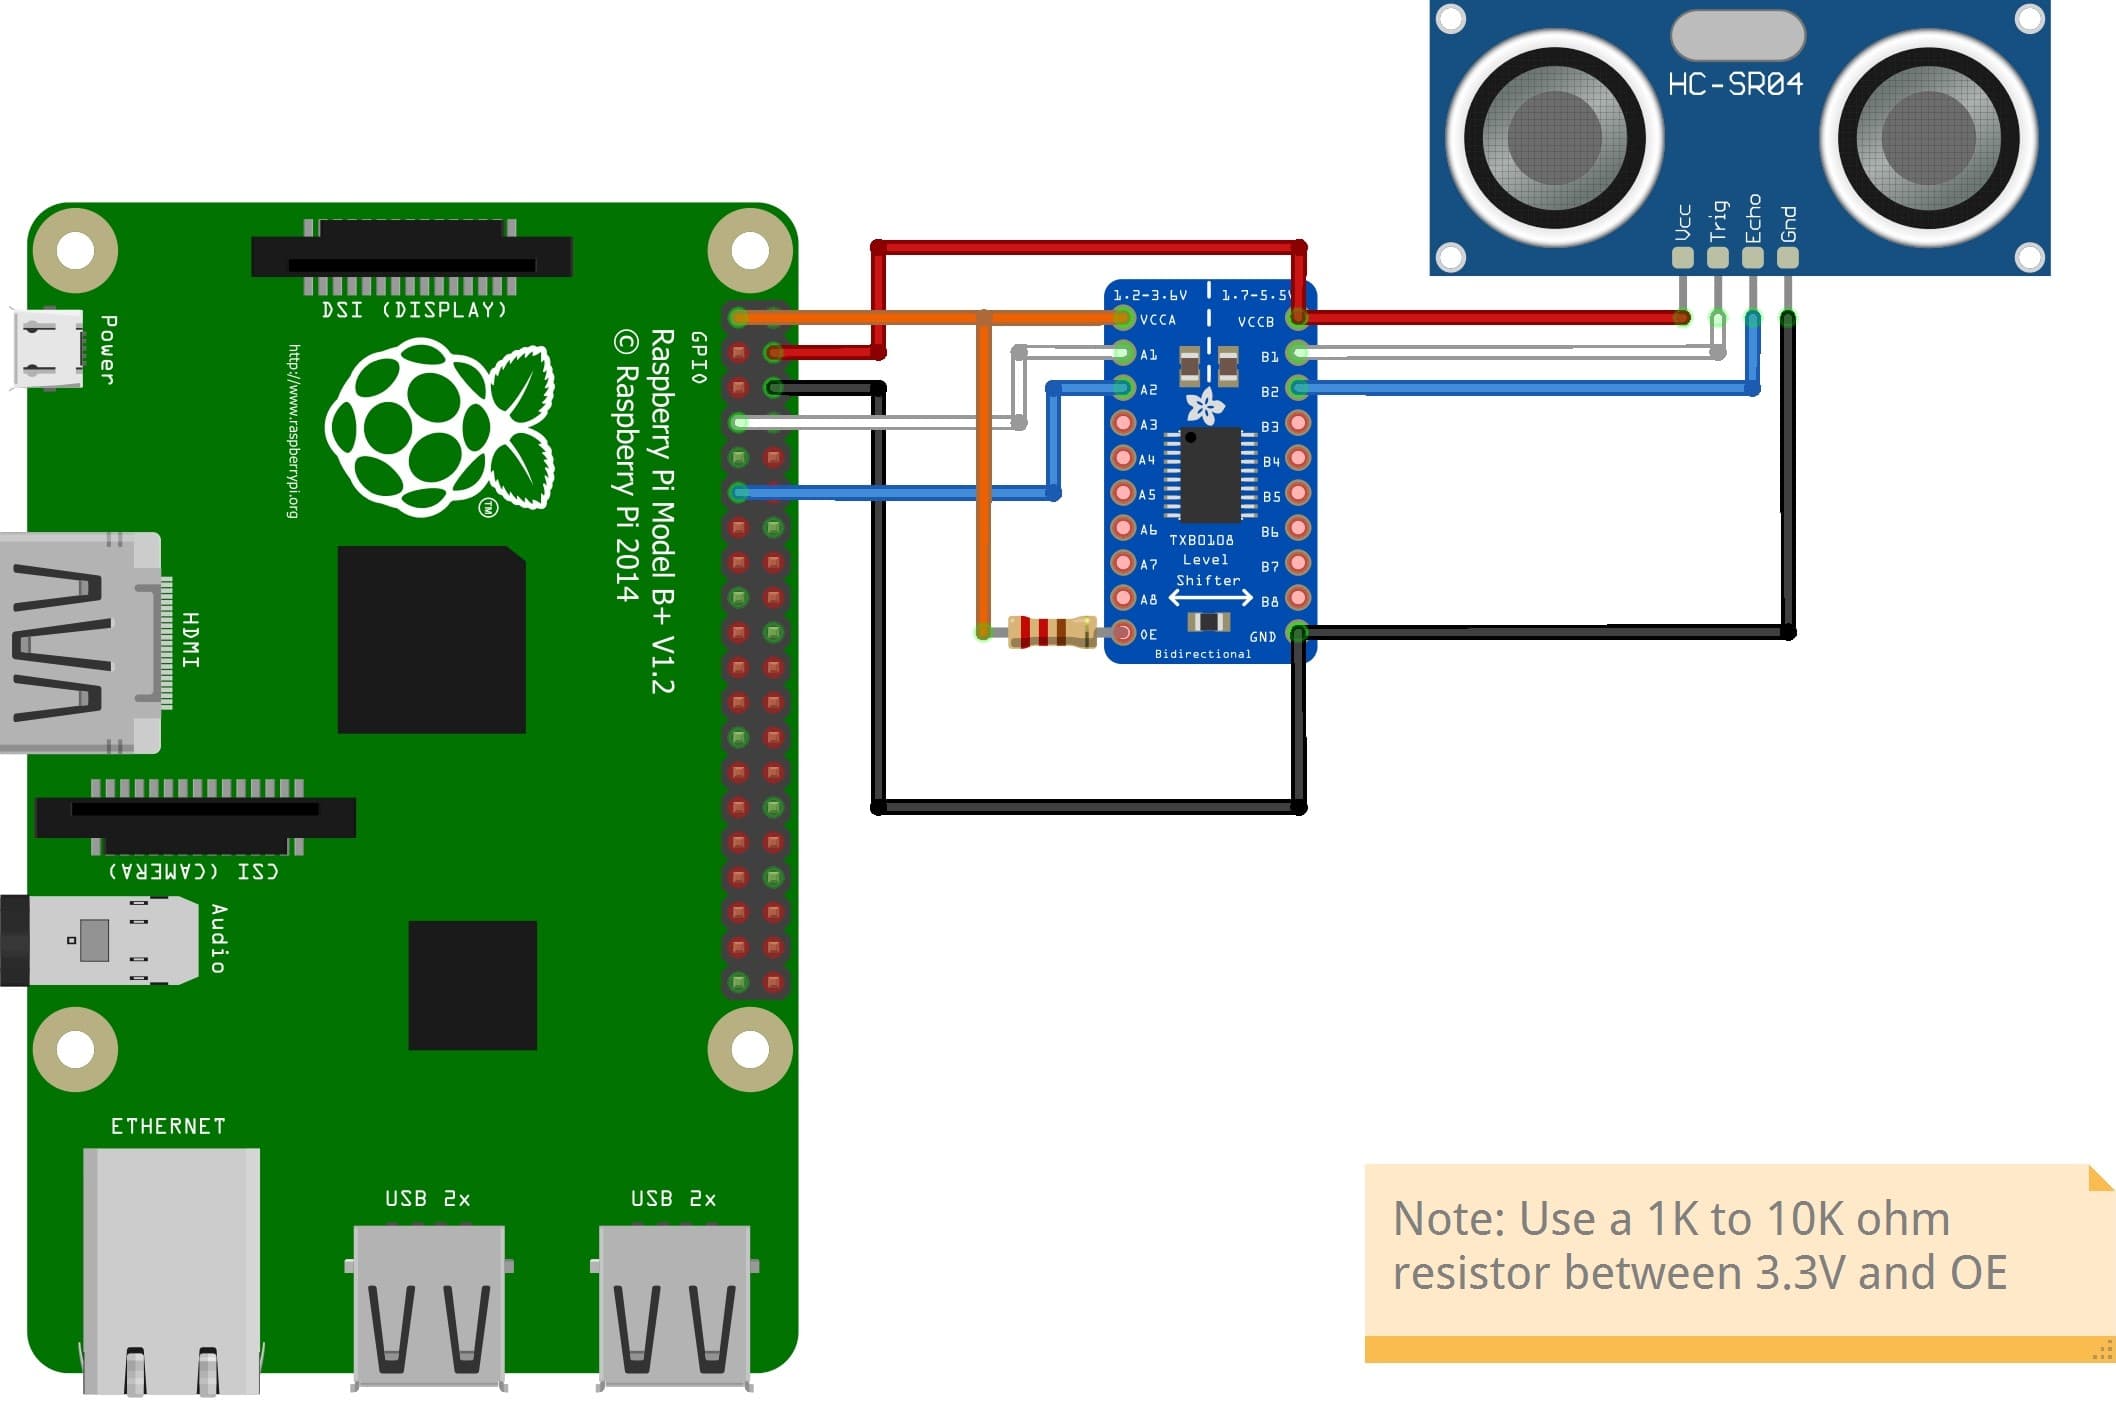
Using 8-Channel Bi-Directional Logic Level Converter (TXB0108)
The below diagram shows the conncections required for connecting Pi to Ultrasonic Sensor (HC-SR04) using a 8-Channel Bi-Directional Logic Level Converter (TXB0108)

Using Resistors in Parallel
Using two 10K Ohm resistors in parallel to reduces their total resistance to 5K Ohm.

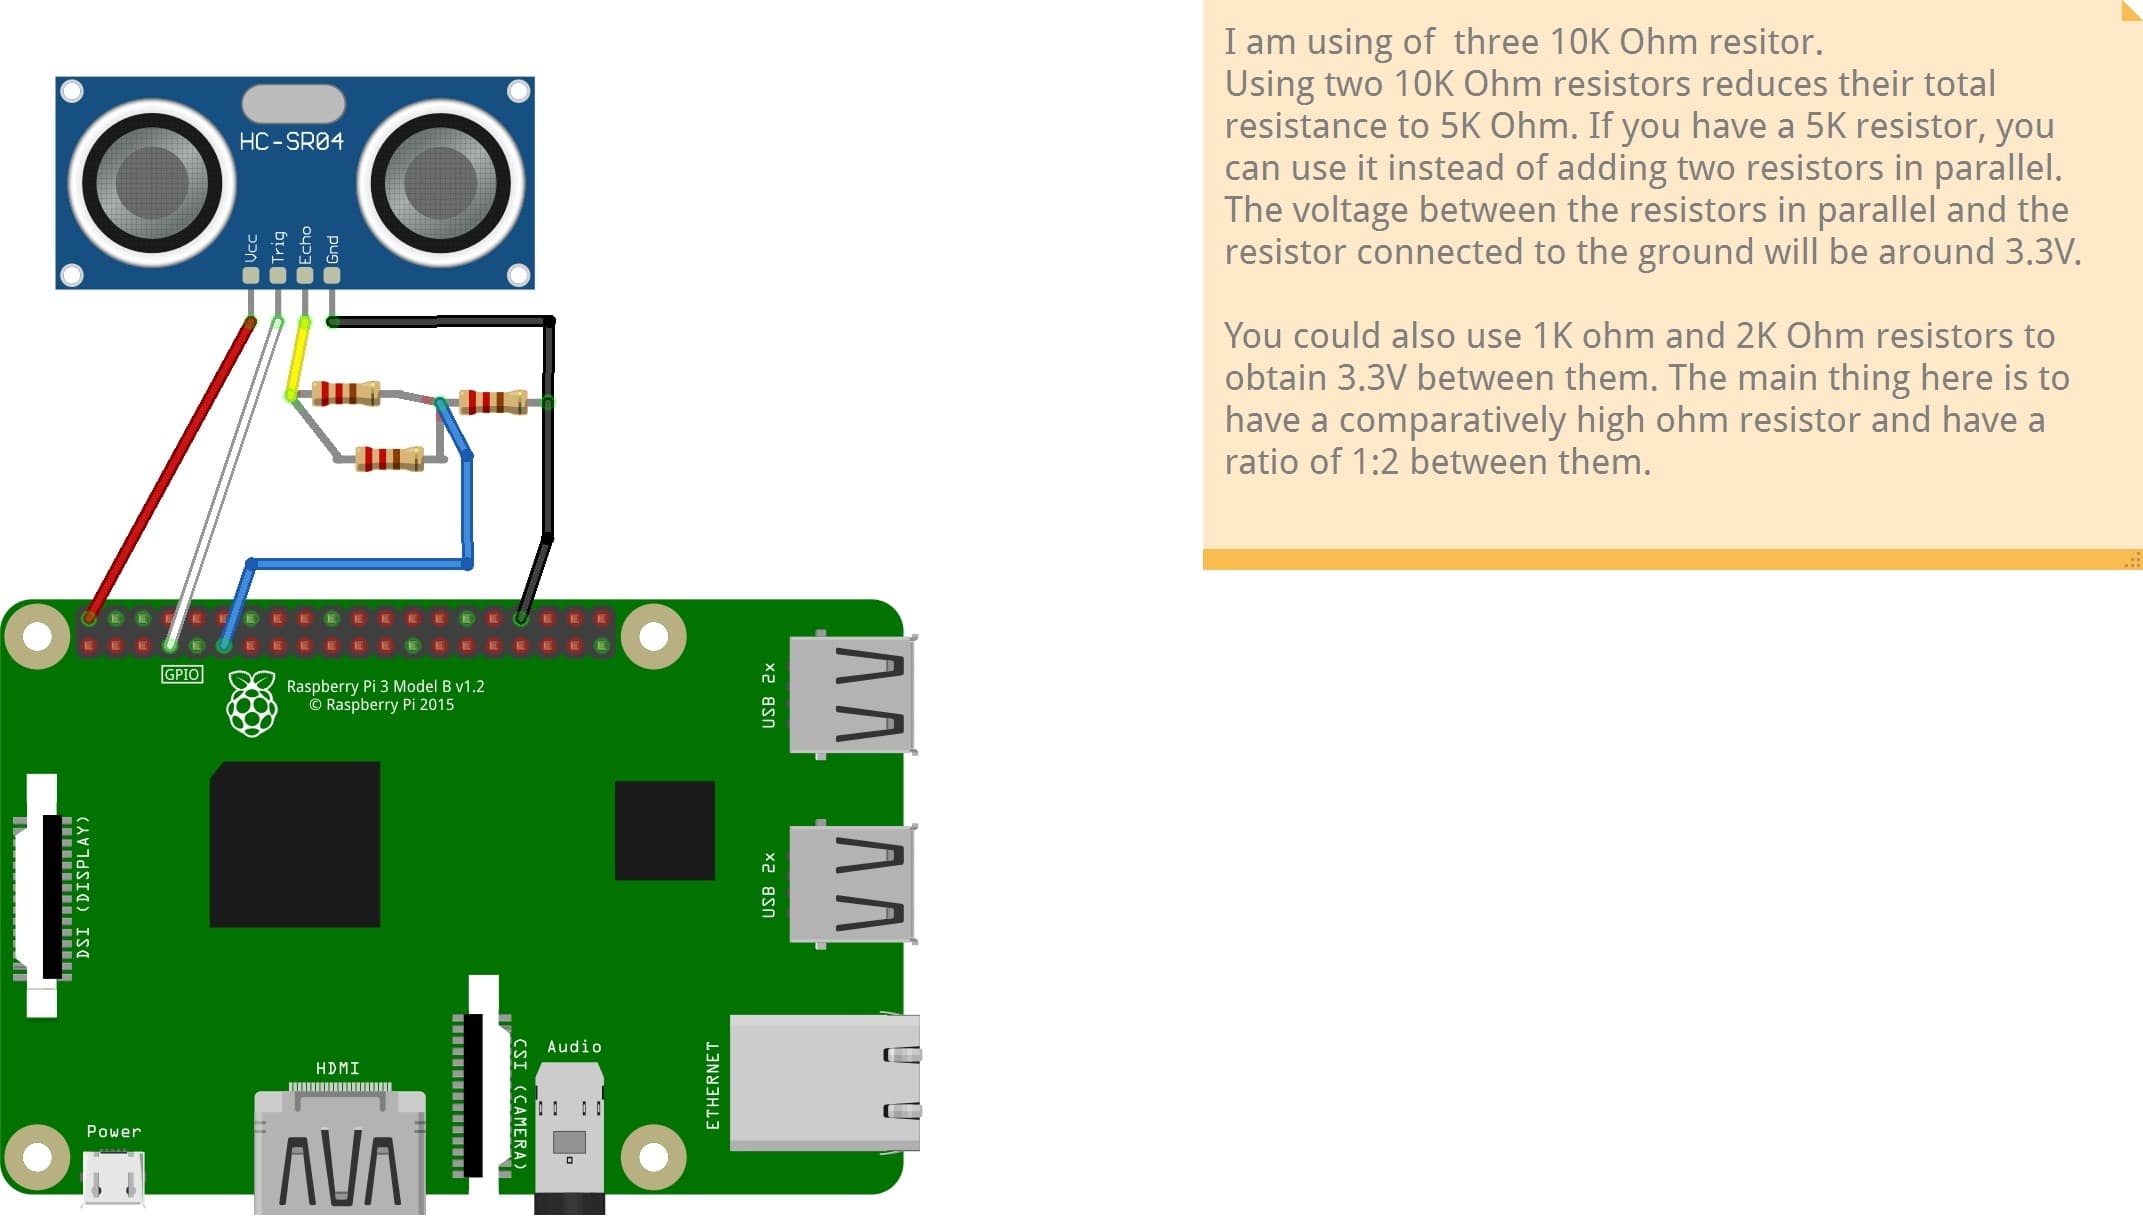
Note: You could also use 1K ohm and 2K Ohm resistors to obtain 3.3V between them. The main thing here is to have a comparatively high ohm resistor and have a ratio of 1:2 between them.
Code
Here is a sample code for working with Ultrasonic Sensor:
import time
import RPi.GPIO as GPIO

GPIO.setmode(GPIO.BCM)

# Define GPIO to use on Pi
GPIO_TRIGGER = 4
GPIO_ECHO    = 17

# Set pins as output and input
GPIO.setup(GPIO_TRIGGER,GPIO.OUT)
GPIO.setup(GPIO_ECHO,GPIO.IN)

# Set trigger to False (Low)
GPIO.output(GPIO_TRIGGER, False)
time.sleep(0.1)

# Measurement Function
def measureDistance():
  GPIO.output(GPIO_TRIGGER, True)
  # Let the trigger be on for 10us
  time.sleep(0.000001)
  GPIO.output(GPIO_TRIGGER, False)

  while GPIO.input(GPIO_ECHO)==0:
    start = time.time()

  while GPIO.input(GPIO_ECHO)==1:
    stop = time.time()

  time_diff = stop-start

  # 34600 cm/s is the speed of sound at 25 Deg C (77F).
  distance = (time_diff * 34600 )/2

  return distance

try:
  while True:
    distance = measureDistance()
    print("Distance : {0:.2f} cm".format(distance))
    # wait for half second
    time.sleep(.5)
except KeyboardInterrupt:
  # User pressed CTRL-C
  # Reset GPIO settings
  GPIO.cleanup()